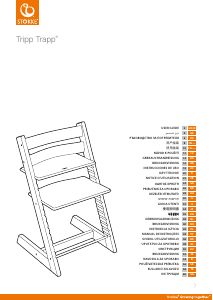
説明書 Stokke Tripp Trapp ベビーハイチェア
Stokke Tripp Trapp ベビーハイチェア のマニュアルが必要ですか? 以下では、日本語の PDF マニュアルを無料で表示およびダウンロードできます。 現在、この製品には 1 のよくある質問、2 のコメントがあり、50 の投票があり、製品の平均評価は 68/100 です。 これがご希望のマニュアルではない場合は、お問い合わせください。
ご利用の製品に欠陥があり、マニュアルでは解決出来ない問題ですか。無料の修理サービスを行うRepair Café (Repair Café) に移動します。
説明書
Loading…

2 UK/IE
On the last pages of this user guide you will find pictures that describe the assem-
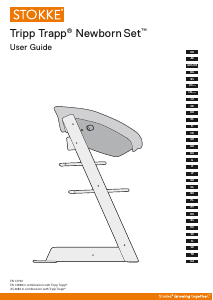
bly of your Tripp Trapp® high chair and Tripp Trapp® Baby Set™. The Tripp Trapp®
Baby Set™ should only be used with the seat plate in the first groove from the top
of the chair. To further increase the backward stability of the Tripp Trapp® chair, a
replaceable, extended rear glider (”Extended Glider” has been developed for the
Tripp Trapp® chair. We recommend that you always use the Tripp Trapp® Extended
Glider while the chair is being used with a harness or the Tripp Trapp® Baby Set™.
The Extended glider is included in the Tripp Trapp® Baby Set™.
Seat and footrest placement
It is important to adjust the depth and height of the seat and footrest to fit the
size of your child. See illustrations at page 62. The position of the seat and footrest
should be checked as the child grows - at least once a year! The seat plate and
the footrest must be supported by the full length of the grooves on the sides (not
half way supported).
Seat placement
Height - The seat is at the correct height when your child’s elbows are level with
the table top.
Depth - For correct depth of the seat, position the child’s back against the back-
rest with the seat supporting ¾ of the thighs. For the child’s best comfort it is
important that the seat depth is not too deep. Leave comfortable space between
the front edge of the seat and back of the child’s knee. It is surprising how small a
seat a 6-8 month-old baby needs! The seat plate should not protrude more than
4-5 cm in front of the side legs.
Footrest placement
Height – The footrest is at the correct height when the sole of the child’s foot can
rest flat on the footrest, while the thighs are touching the seat.
Depth – Make sure the forward edge of the footrest NEVER protudes beyond the
front tip of the chair legs at floor level.
Cleaning and maintenance
Wipe with a clean damp cloth, wipe off excess of water with a dry cloth. Moisture
will leave cracks in stain. We do not recommend the use of any detergent or micro
fibre cloth. Colours may change if the high chair is exposed to sunlight.
Product information
The chair is made of cultivated beech. The varnish contains no harmful sub-
stances, and the liberation of formaldehyde from the varnish complies with E1
requirements.
Safety approval
Tripp Trapp® high chair assembled with Tripp Trapp® Baby Set™ complies with
EN 14988:2012
IMPORTANT! KEEP FOR FUTURE REFERENCE
READ CAREFULLY BEFORE ASSEMBLING YOUR TRIPP TRAPP® HIGH CHAIR.
Rugs and tiles
To prevent the Tripp Trapp® high chair from tilting backwards, it has plastic
gliders underneath the legs. Their function is to make the high chair slide
backwards and return to an upright position when lifted from the floor in front.
To make sure that the gliders function as intended, the high chair should be
placed on a surface that doesn’t inhibit it from sliding backwards. That means
that the surface should be level, stable and with a certain hardness.
Carpets and rugs that are soft or with long loose ends that the high chair could
sink into, is an unsuitable surface for your Tripp Trapp® high chair. Uneven floors,
like some tiled floors could be are also an unsuitable surface for your Tripp
Trapp® high chair.
The gliders as well as the floor must be kept clean.
Table
Be aware of the risk that
a big frame under the
table top makes it easier for
children to push their legs
against the table and tilt
backwards. Also note that
Tripp Trapp® is designed for
dining tables 72-76 cm high.
Footrest
Make sure the forward
edge of the footrest NEVER
protrudes beyond the front
tip of the chair legs at floor
level. This may cause the
chair to be unstable when
a child climbs in and out of
the Tripp Trapp® high chair.
XDo not leave the child unattended.
XStay in reach of your child.
XIf you use any harness with the high chair make sure it is correctly fitted.
XDo not use the high chair unless all components are correctly fitted and
adjusted. Pay special attention to the seat and footplate - make sure these are
properly fastened before you put your child into the high chair.
XDo not place the high chair near an open fire or other sources of strong heat,
such as electric bar fires, gas fires etc due to the risk of fire.
XDo not use the high chair if any part is broken, torn or missing.
XDo not use the high chair before the child can sit up unassisted.
XAlways place the high chair on a level stable surface and make sure that the high
chair has space to slide backwards.
XAlways use the crotch strap in combination with the rail and the high backrest.
XBe careful not to place small items, toxic substances, hot objects, electrical
flexes etc near the high chair where your child can reach them, as they may
cause choking, poisoning or other injuries.
XRemember to retighten all screws 2-3 weeks after assembly of the high chair.
After that you should check on and retighten the screws if necessary on a
regular basis, e.g. every second month. Keep the Allen key for future use.
XDo not use any accessories or replacement parts not manufactured by STOKKE;
this may affect your child’s safety.
XDo not use the high chair as a stepstool.
XLoosen the screws before installing and removing the rail. This way you will not
damage the lacquer and woodwork. If the Tripp Trapp® high chair is adjusted
correctly, you can easily take your child in and out without removing the rail at all.
XWhen the footrest is positioned close to the metal rod,
there will be a small gap between the inside of the chair
legs and the metal rod. This is perfectly normal. Never
try to use excessive force to make the metal rod touch
the side legs of the chair as this can cause damage to
the chair and/or make it unstable.
XNEVER use the Tripp Trapp® chair without a glider.
WARNING!

Loading…
評価
Stokke Tripp Trapp ベビーハイチェアについて、製品の評価を入力し、お客様のお考えをお教えてください。この製品とのお客様の経験を共有したいですか、または質問したいですか。ページ下部にコメントを入力してください。このマニュアルの詳細
Stokke Tripp Trapp ベビーハイチェア に紙のマニュアルがあると便利だと理解しています。 マニュアルは当社 Web サイトからいつでもダウンロードして、ご自身で印刷していただけます。 オリジナルのマニュアルが必要な場合は、Stokke にお問い合わせいただくことをお勧めします。 オリジナルのマニュアルを提供してくれるかもしれません。 Stokke Tripp Trapp ベビーハイチェア の別の言語のマニュアルをお探しですか? 当社のホームページでご希望の言語を選択し、モデル番号を検索して入手可能かどうかを確認してください。
仕様
| メーカー | Stokke |
| モデル | Tripp Trapp |
| カテゴリー | ベビーハイチェア |
| ファイルの種類 | |
| ファイルサイズ | 15.38 MB |
Stokke ベビーハイチェア のすべてのマニュアル
ベビーハイチェア のその他のマニュアル
Stokke Tripp Trapp ベビーハイチェア に関するよくある質問
当社のサポートチームは有用な製品情報とよくある質問への回答を検索します。よくある質問に誤りがある場合は、お問い合わせフォームを介してお知らせください。

この商品に関する会話に参加する
ここでは、Stokke Tripp Trapp ベビーハイチェア についての意見を共有できます。 疑問がある場合は、まず説明書をよく読んでください。 マニュアルのご請求は、お問い合わせフォームより承ります。
返答 | 役に立った (0) (Googleによる翻訳)
返答 | 役に立った (0) (Googleによる翻訳)