説明書 フィリップス QG3060 ヘアクリッパー
フィリップス QG3060 ヘアクリッパー のマニュアルが必要ですか? 以下では、日本語の PDF マニュアルを無料で表示およびダウンロードできます。 この製品には現在、2 件のよくある質問、0 件のコメントがあり、0 件の投票があります。 これがご希望のマニュアルではない場合は、お問い合わせください。
ご利用の製品に欠陥があり、マニュアルでは解決出来ない問題ですか。無料の修理サービスを行うRepair Café (Repair Café) に移動します。
説明書
Loading…

ENGLISH
Introduction
Congratulations on your purchase and welcome to
Philips! To fully benet from the support that Philips offers,
register your product at www.philips.com/welcome.
General description (Fig. 1)
A 2D Contour Tracking beard trimming comb
B Trimming attachment
C Hair length selector
D Release button
E On/off slide
F Socket for appliance plug
G Cleaning brush
H Barber’s comb
I Charging light
J Adapter
K Appliance plug
L Nose/ear/eyebrow attachment
M Charging stand with storage facility
N Precision attachment (HQG267/QG3040 only)
Important
Read this user manual carefully before you use the
appliance and save it for future reference.
Danger
- Make sure the adapter does not get wet.
Warning
- Check if the voltage indicated on the appliance
corresponds to the local mains voltage before you
connect the appliance.
- The adapter contains a transformer. Do not cut
off the adapter to replace it with another plug, as
this causes a hazardous situation.
- This appliance is not intended for use by persons
(including children) with reduced physical, sensory
or mental capabilities, or lack of experience and
knowledge, unless they have been given supervision
or instruction concerning use of the appliance by a
person responsible for their safety.
- Children should be supervised to ensure that they
do not play with the appliance.
Caution
- Do not immerse the appliance in water or any other
liquid, nor rinse it under the tap.
- Use, charge and store the appliance at a temperature
between 15°C and 35°C.
- Only use the adapter supplied.
- Do not use a damaged adapter.
- If the adapter is damaged, always have it replaced
with one of the original type in order to avoid a
hazard.
- Do not use the appliance if one of the attachments
or combs is damaged or broken, as this may cause
injury.
- This appliance is only intended for trimming the
human beard, moustache, sideburns, nose hair,
ear hair and eyebrows. Do not use it for another
purpose.
- Never try to trim your eyelashes.
- If the appliance is subjected to a major change in
temperature, pressure or humidity, let the appliance
acclimatise for 30 minutes before you use it.
Compliance with standards
- This Philips appliance complies with all standards
regarding electromagnetic elds (EMF). If handled
properly and according to the instructions in this
user manual, the appliance is safe to use based on
scientic evidence available today.
Preparing for use
Charging
Charge the appliance for at least 10 hours before you use
it for the rst time and after a long period of disuse.
When the appliance is fully charged, it has a cordless
operating time of up to 35 minutes.
Do not charge the appliance for more than 24 hours.
Note: The appliance is not suitable for mains operation.
You can charge the appliance in 2 different ways:
Charging in the charging stand
1 Make sure the appliance is switched off.
2 Insert the pin of the appliance plug into the opening
in the bottom of the stand (1) and push the plug
sideways to lock it into place (2) (Fig. 2).
3 Place the appliance in the charging stand on the
appliance plug (Fig. 3).
4 Put the adapter in the wall socket.
, The charging light goes on. The light stays on
as long as the appliance is connected to the
mains (Fig. 4).
Charging outside the charging stand
1 Make sure the appliance is switched off.
2 Insert the appliance plug into the socket of the
appliance (Fig. 5).
3 Put the adapter in the wall socket.
, The charging light goes on. The light stays on
as long as the appliance is connected to the
mains (Fig. 4).
Optimising the lifetime of the rechargeable
battery
- Do not leave the appliance plugged into the wall
socket for more than 24 hours.
- Discharge the battery completely twice a year
by letting the motor run until it stops. Then fully
recharge the battery.
Using the appliance
Note: Always comb the hair with a ne comb in the hair
growth direction before you start trimming.Make sure that
the hair is dry and clean.
Beard trimming with comb
1 Put the beard trimming comb on the trimming
attachment and push it home (‘click’) (Fig. 6).
2 Press the hair length selector and slide it to the
desired setting. See the table below (Fig. 7).
The selected setting appears in the window to the left of
the hair length selector.
- When you trim for the rst time, start at the highest
setting (9) to familiarise yourself with the appliance.
- To create a ‘stubble look’, trim with the beard
trimming comb set to hair length setting 1.
Settings of the beard trimming comb
Setting Hair length after trimming
1 2mm
2 4mm
3 6mm
4 8mm
5 10mm
6 12mm
7 14mm
8 16mm
9 18mm
3 To trim most effectively, move the appliance against
the hair growth direction (Fig. 8).
Do not move the appliance too fast. Make smooth and
gentle movements and make sure the surface of the
comb always stays in contact with the skin.
If a lot of hair has accumulated in the comb, remove the
comb from the appliance and blow and/or shake the hair
out of it.
Note: You have to set the hair length selector to the
desired setting again after you have removed the comb.
Beard trimming without comb
Trimming without the comb results in a very short
stubble beard.
1 Press and slide the hair length selector upwards (1)
and pull the beard trimming comb off the appliance
(2) (Fig. 9).
Note: Never pull at the exible top of the comb. Always pull
at the bottom part.
2 Make well-controlled movements and touch your
beard only lightly with the trimming attachment.
Using the precision attachment (HQG267/
QG3040 only).
You can use the precision attachment to dene the
contours of your beard, moustache and sideburns.
1 Press and slide the hair length selector upwards
(1) and pull the beard trimming comb off the
appliance (2) (Fig. 9).
Note: Never pull at the exible top of the comb. Always pull
at the bottom part.
2 Press the release button (1) and pull the trimming
attachment off the appliance (2) (Fig. 10).
3 Put the precision attachment on the
appliance (Fig. 11).
4 Hold the appliance upright when you use the
precision attachment (Fig. 12).
Grooming nose hair, ear hair and eyebrows
1 Press and slide the hair length selector upwards (1)
and pull the beard trimming comb off the appliance
(2) (Fig. 9).
Note: Never pull at the exible top of the comb. Always pull
at the bottom part.
2 Press the release button (1) and pull the trimming
attachment off the appliance (2) (Fig. 10).
3 Put the nose/ear/eyebrow attachment on the
appliance (‘click’) (Fig. 13).
Trimming nose hair
1 Make sure your nostrils are clean.
2 Switch on the appliance and insert the tip of the
trimmer into one of your nostrils (Fig. 14).
Do not insert the tip more than 0.5cm into your nostril.
3 Slowly move the tip in and out while turning it
round at the same time to remove unwanted hair.
To reduce the tickling effect, make sure that you press the
side of the tip rmly against the skin.
Trimming ear hair
1 Clean the outer ear channel. Make sure it is free
from wax.
2 Switch on the appliance and move the tip softly
round the ear to remove hairs that stick out
beyond the rim of the ear (Fig. 15).
3 Carefully insert the tip into the outer ear
channel (Fig. 16).
Do not insert the tip more than 0.5cm into the ear
channel as this could damage the eardrum.
Trimming eyebrows
Use the tip to cut individual eyebrow hairs.
Do not use the appliance to dene or trim the entire
eyebrow.
1 Place the tip of the attachment on the upper edge
of the eyebrow.
2 Move the tip of the attachment along the edge of
the eyebrow from the base of the nose towards the
outer tip of the eyebrow (Fig. 17).
Cleaning
Never use scouring pads, abrasive cleaning agents or
aggressive liquids such as alcohol, petrol or acetone to
clean the appliance.
Note: The appliance does not need any lubrication.
Clean the appliance every time you have used it.
1 Make sure the appliance is switched off and
disconnected from the mains.
2 Remove any comb and/or attachment from the
appliance.
3 Blow and/or shake out any hair that has
accumulated in the attachment and/or comb.
4 Clean the outside and inside of the attachment
with the brush cleaning brush (Fig. 18).
2
4222.002.8130.1
Loading…
評価
フィリップス QG3060 ヘアクリッパーについて、製品の評価を入力し、お客様のお考えをお教えてください。この製品とのお客様の経験を共有したいですか、または質問したいですか。ページ下部にコメントを入力してください。このマニュアルの詳細
フィリップス QG3060 ヘアクリッパー に紙のマニュアルがあると便利だと理解しています。 マニュアルは当社 Web サイトからいつでもダウンロードして、ご自身で印刷していただけます。 オリジナルのマニュアルが必要な場合は、Philips にお問い合わせいただくことをお勧めします。 オリジナルのマニュアルを提供してくれるかもしれません。 フィリップス QG3060 ヘアクリッパー の別の言語のマニュアルをお探しですか? 当社のホームページでご希望の言語を選択し、モデル番号を検索して入手可能かどうかを確認してください。
仕様
| メーカー | Philips |
| モデル | QG3060 |
| カテゴリー | ヘアクリッパー |
| ファイルの種類 | |
| ファイルサイズ | 6.76 MB |
フィリップス ヘアクリッパー のすべてのマニュアル
ヘアクリッパー のその他のマニュアル
フィリップス QG3060 ヘアクリッパー に関するよくある質問
当社のサポートチームは有用な製品情報とよくある質問への回答を検索します。よくある質問に誤りがある場合は、お問い合わせフォームを介してお知らせください。
濡れた髪にバリカンを使用できますか? 確認済み
濡れた髪にはバリカンを使用しないでください。バリカンが詰まって痛みを引き起こす可能性があります。水はまた、バリカンの刃を錆びさせる可能性があります。
役に立った (108) 続きを読む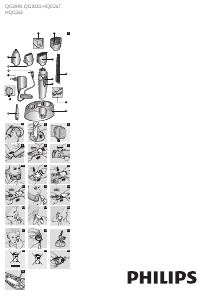


この商品に関する会話に参加する
ここでは、フィリップス QG3060 ヘアクリッパー についての意見を共有できます。 疑問がある場合は、まず説明書をよく読んでください。 マニュアルのご請求は、お問い合わせフォームより承ります。